Boldly Going Webcast: Behind the Scenes
If you’re a fellow amateur astronomer, you might be curious as to how our “live star parties” on our Boldly Going YouTube Channel are produced. The more people doing this, the better! Here’s how it all works behind the scenes, which might give you some ideas on how to produce your own show.
The Heart of it all: OBS Studio
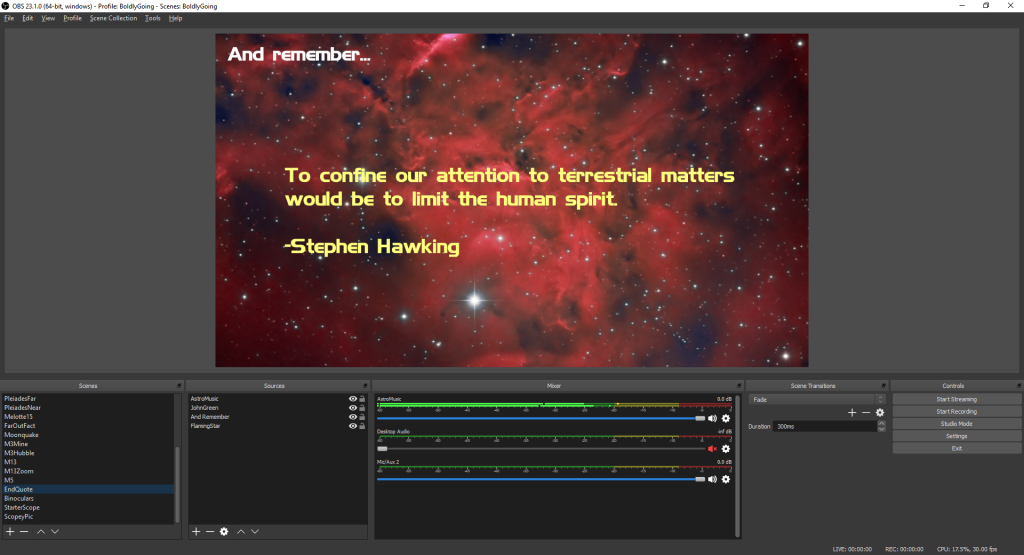
This is what I’m looking at on that screen most of the time: OBS Studio. It’s free software that’s popular with live streamers, but we can also use it to produce live shows of my family looking at stuff through our telescope that look professionally produced.
I won’t get into all the details of how to use it, but it’s pretty easy to pick up. At its core is the concept of “scenes,” so I spend some time before the show thinking of what scenes I might want to show. These can included canned animations from NASA, our pre-recorded intro segments, a live stream from an IP webcam for our “live scopecam,” and a screen capture of TheSkyX so we can show what’s coming in from the live stack of our telescope’s camera. There’s also a scene that’s just the camera view of our family.
Once you’ve set up all of your scenes, when you’re live it’s just a matter of clicking between them when you decide to talk about whatever that scene represents.
OBS Studio can record to an MP4 video file that you can edit and upload later, and it can also stream live to YouTube and other platforms if you’re feeling brave.
What’s Outside
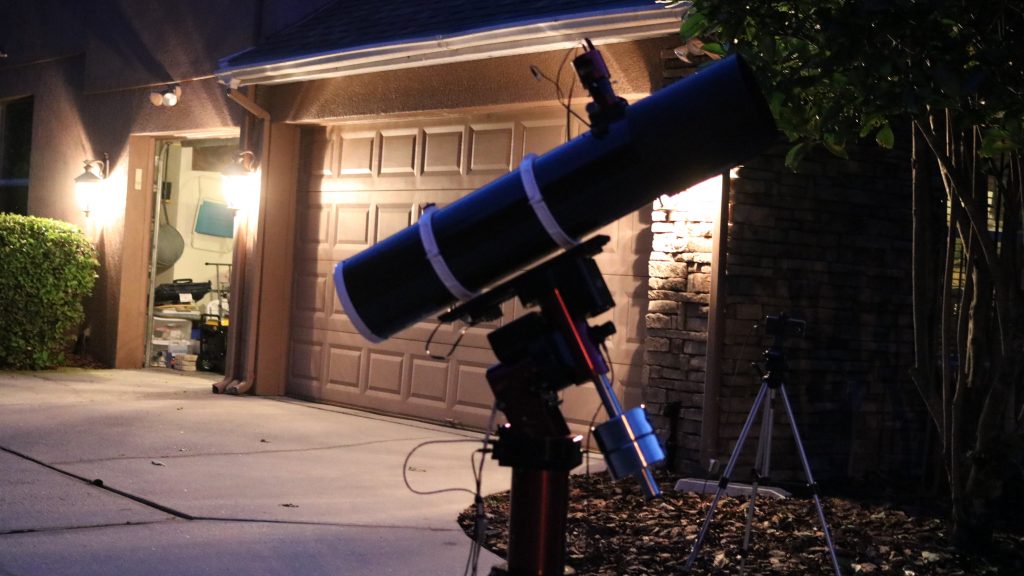
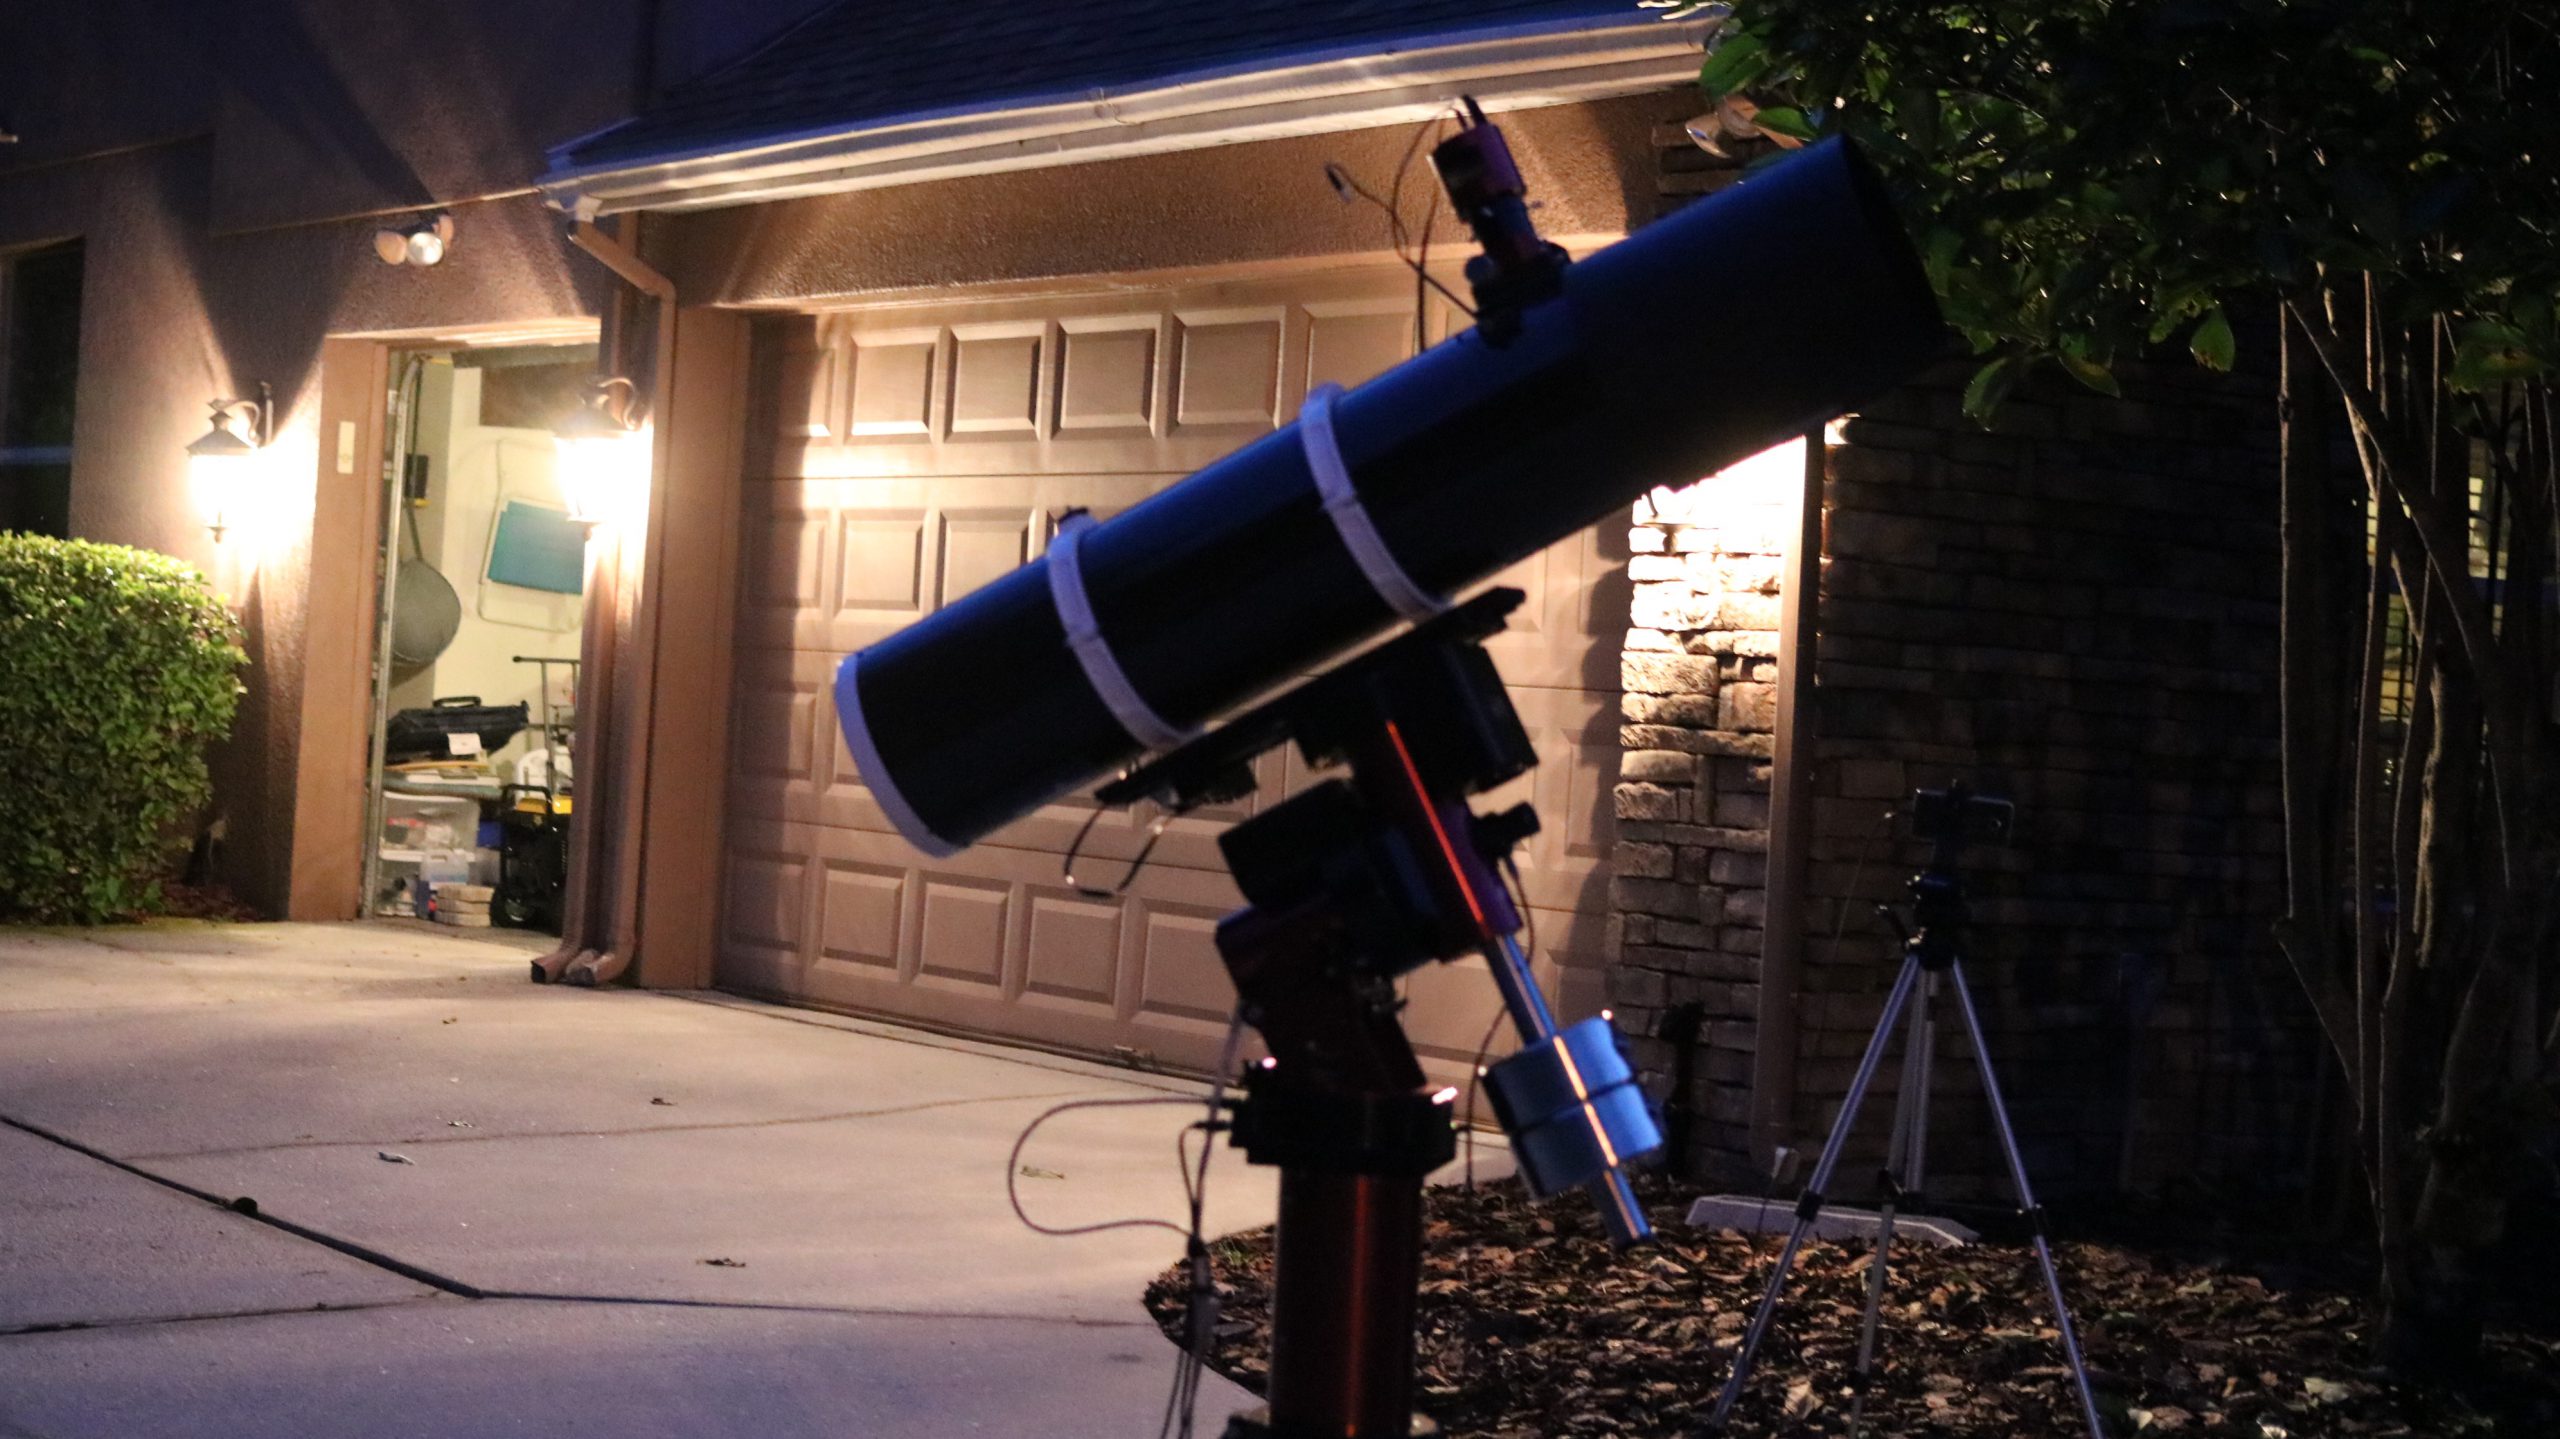
Sitting out in our driveway is the star of the show: Scopey McScopeFace! It’s a Sky-Watcher StarLux 190MN on a Paramount MyT mount. For live color images, we attach a one-shot-color CMOS camera to its focuser (a ZWO ASI 294MC Pro,) and we also have more sensitive mono cameras to choose from if we’re going to go after dim nebulae or galaxies. The focuser itself is also motorized, so everything about the telescope can be controlled remotely – positioning, focusing, and image capture. This allows us to control the telescope from inside our office where we’re recording the episode from.
The software I use to control the telescope and its imaging system is TheSkyX Pro. It also includes a “live stacking” capability, which is what we use to produce the images we display throughout the show. This software is what’s running on the second monitor in front of me, and it’s captured as a source in OBS Studio so I can broadcast what’s going on in it when I want to.
You’ll notice there is also a tripod behind the telescope – this is the “Live ScopeCam” that we use for establishing shots. It’s important to convey that you are really looking live through a telescope, and not just images on a computer. This camera allows us to switch to a live video of the scope moving to point at its target, or of it looking at its target, which helps to drive that point home to the viewers. It is nothing more than my cell phone, running software called IP Webcam. OBS Studio can connect to it as another video source via WiFi. IP Webcam has a useful night-vision mode, but I also keep my outdoor lights on while recording to get a better image. My dew shield blocks them out for the most part.
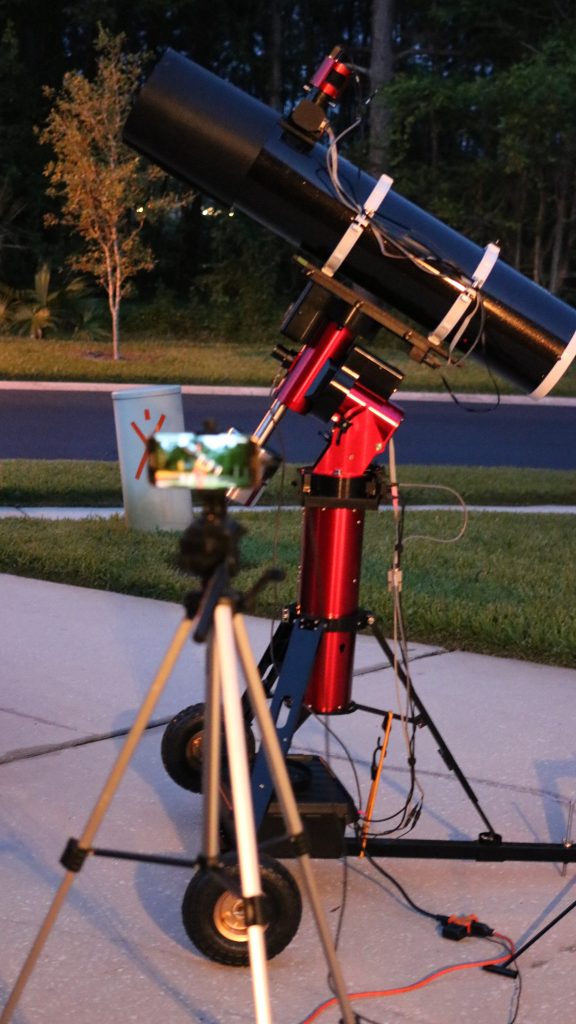
Speaking of WiFi – it’s important to have a really good connection out where this equipment is. I have a WiFi extender that works over our AC wiring, plugged into the room in our house just above where the telescope sits.
The guts of it
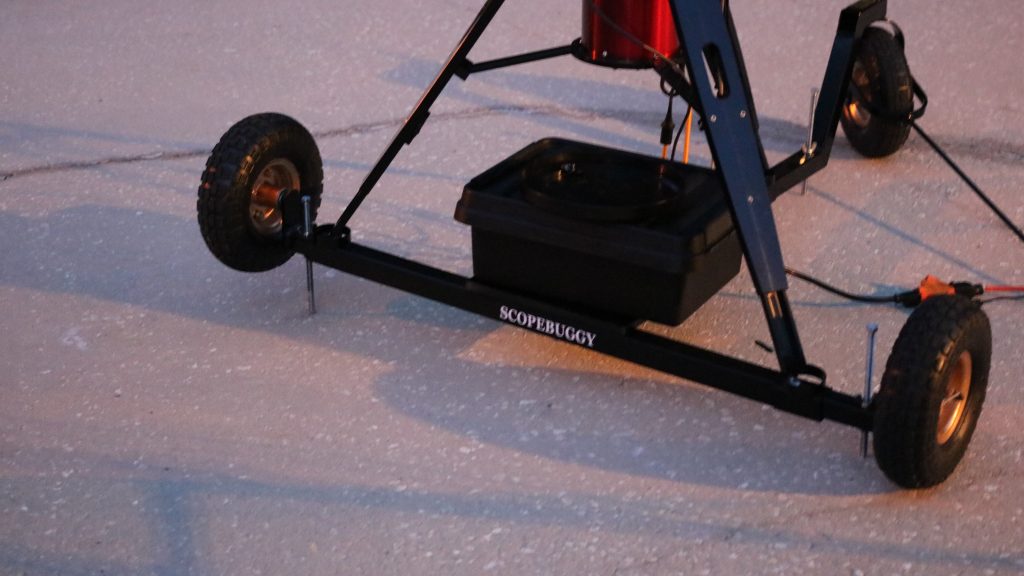
So, how does my computer in my office communicate with the telescope? The magic is all inside this little box underneath the telescope. Hidden in there is a mini-PC (an Intel NUC) and that’s where TheSky X is actually running. There’s also a USB3 hub in there, collecting all the connections from the camera, mount, and focuser and feeding them into the PC.
The mini-PC has built-in WiFi and is connected to my home network. To control it remotely from my office, I use TeamViewer – also free software. So, when I said I was running TheSkyX on my second monitor – I fibbed a little. I’m really running TeamViewer on my second monitor, connected to my computer in the driveway that’s actually running TheSkyX.
The whole thing is on wheels; it’s important that it’s easy to set all of this up, or you’ll find excuses not to do it. It’s called a ScopeBuggy, and as you can see it has anchoring bolts to hold it securely to the driveway once it is in place and polar aligned. (I actually replaced these bolts with ones I could quickly tighten and loosen with a cordless drill to make it even easier.)
This same setup makes it super-easy to do long-exposure imaging as well. I can set up so quickly that some nights my family doesn’t even realize that I’m imaging!
The A/V Gear
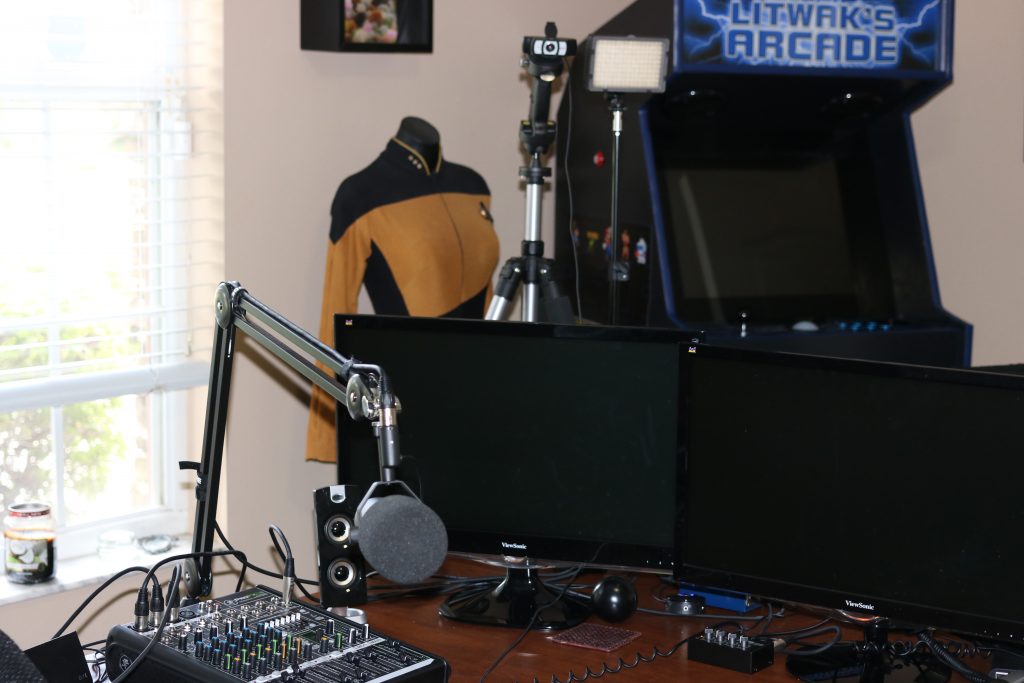
Look, you really don’t need all of the fancy A/V equipment I’m using. I just happened to have most of it because my job as an online educator requires it.
But if you’re curious – those mics are Shure SM7B’s, run through CloudLifters to boost their signals, and then into a Mackie ProFX8 mixing console that ultimately feeds into my PC, where OBS Studio will see it as an audio source. OBS Studio also sees it as an audio output device, so we can feed in audio from any clips we’re showing and hear them in our headphones together with our own voices. Our headphones are Sony MDR 7506’s, run through a little Behringer 4-channel headphone amplifier.
We only have 3 Shure SM7B’s, so when all four of us are here we’ll also use a Rode NTG2 shotgun mic.
The camera itself is much more low-tech; it’s just a Logitech C930 webcam, attached to an Amazon Basics camera tripod.
If it’s just you, a simple USB microphone and a webcam is all you really need.
Anyhow – I do hope others try doing something similar. The audience you can reach via YouTube and other platforms is much larger than what you could achieve at a local outreach event, and the potential of online outreach is pretty amazing. We plan to stick with it and hopefully watch it grow.
